|
Does the world really need another no-sew fleece tie blanket post? Perhaps not, but I really like this version - it has all the no-sew awesomeness but is much less bulky than the traditional versions. Our late chihuahua Lily loved burrowing under hers, while Mr. Tedy...well, let's not discuss what he does with his! 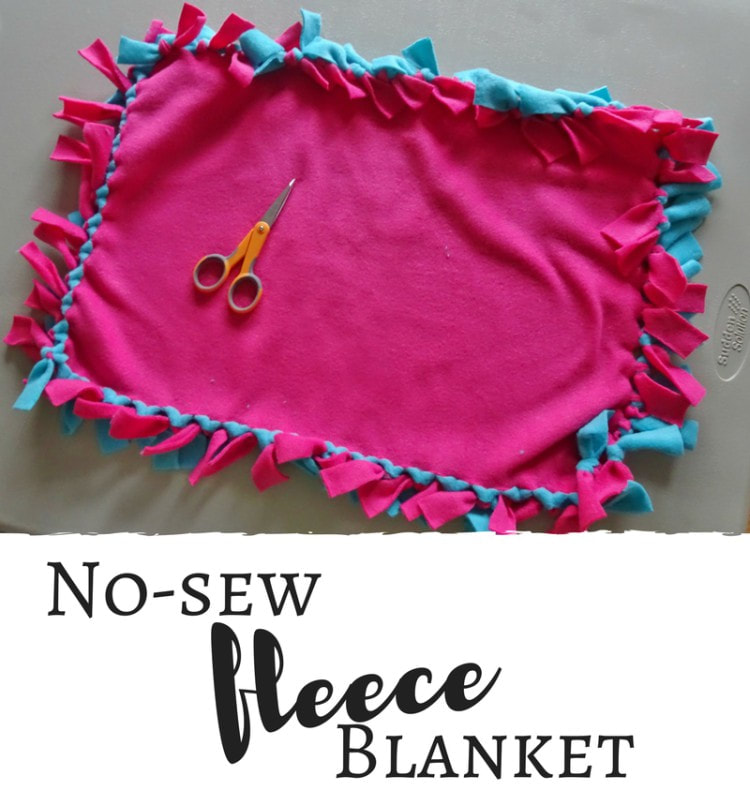 I got the idea for this new-to-me version from Newlywed Survival, who posted about a blanket without the bulky knots. Well, count me in for that! But I started making these for shelters and rescues, and they need to be easily washable. I found the fringe loops tended to come out pretty easily. So I just added a small modification and was left with this version, which I've adopted as my go-to method for fleece blankets. What you need
How much fleece you use is obviously going to depend on the size of the blanket you're aiming for. I like to start with at least 24" square for cat blankets. The brilliant thing is that you can't mess this us. Even a large dog can make use of a smaller blanket. And if the sizes are uneven - well, you won't hear any complaints from the pets. (You'll notice these fleece pieces don't perfectly line up either.) Score one for imperfection! Cut off the selvage (the rough edges) of the fabric and cut to make sure both of your fabrics are the same size. Place them right sides OUT. 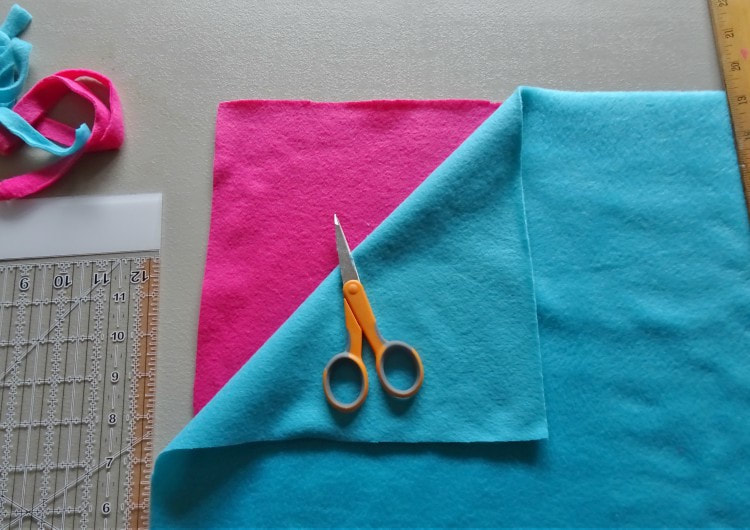 Next, cut out 3 inch squares from each of the corners. It helps to make a simple template, as I did here from cardstock. 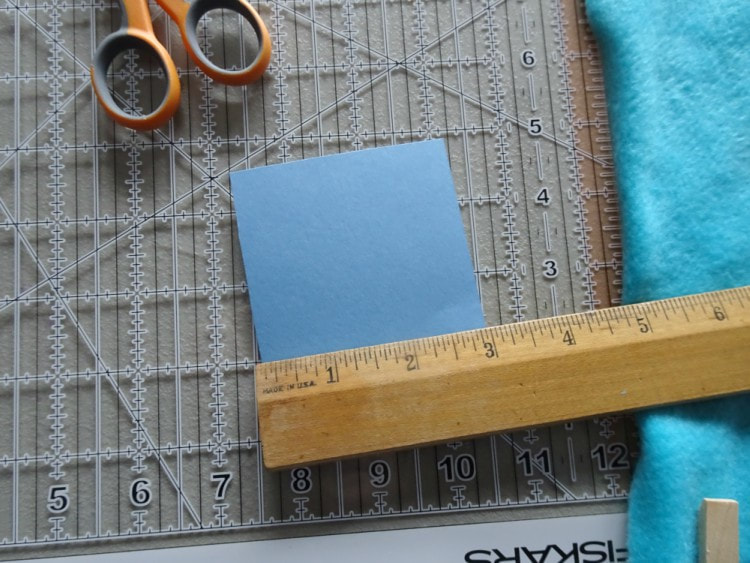 Use your tape (I prefer Washi tape because it's just the right amount of sticky to stay in place but not to ruin the fabric! It's a great way to use up the less-lovely designs.) to make a line from one tip of the side square to the other. (Pretty sure that makes no sense - good thing we have photos here, see below!) 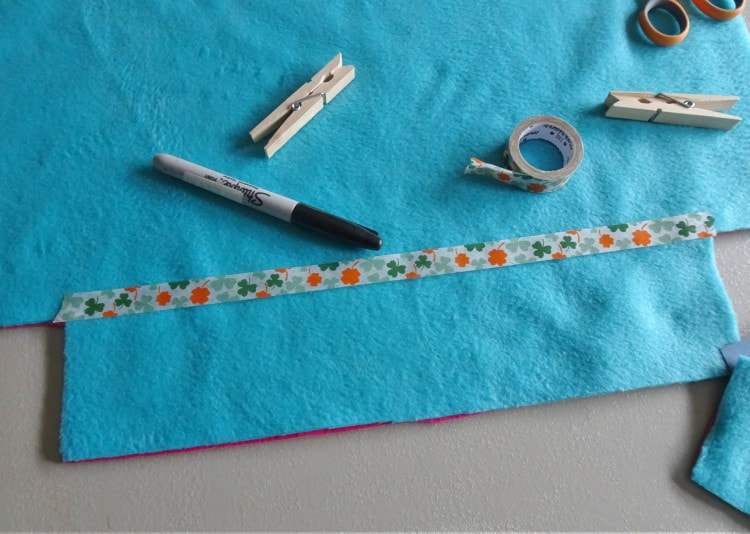 When I was first starting out, I would trace 1" increments right on to the Washi tape. After a few blankets, I learned to skip this step and just use the yard stick. The measurements don't need to be exact. Close enough is, well, good enough. Time to start cutting your fringe. I aim for 1" intervals, making sure to cut through both layers of fabric. 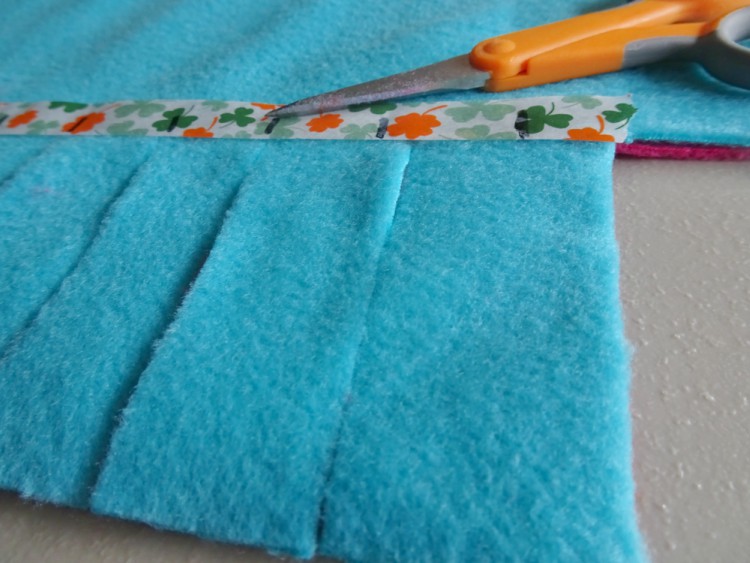 Then comes the new part (or at least, the new-to-me part). Fold up the fringe and make a slit as shown in the photo. (The trick is cutting through both pieces at the same time. With thicker fleece, you may have to go over the make a snip in each side.) Then pull the fringe piece through the slit. This is where Newlywed Survival stopped but I found it was still too loose for my liking. 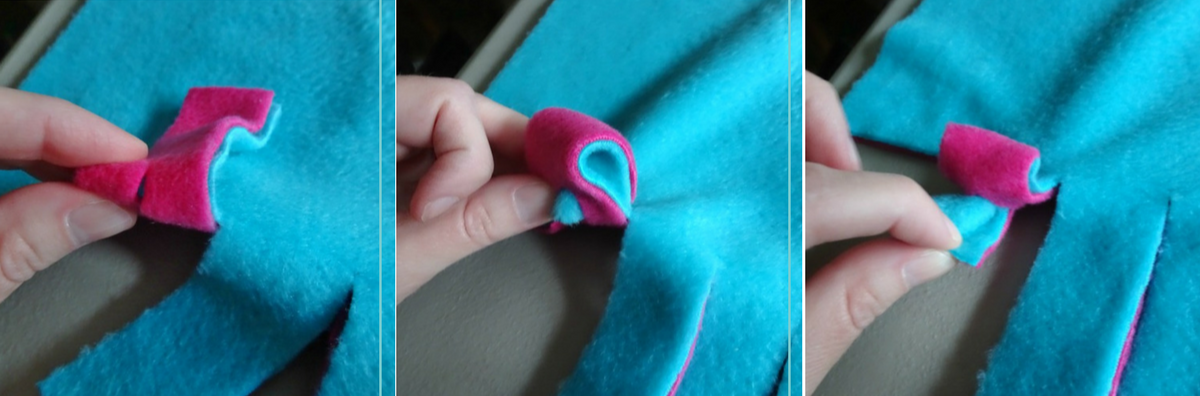 So I added a single knot. That's it. It holds it all in place but still looks pretty neat (if I may say so!). Continue along the row and then around the other three sides. 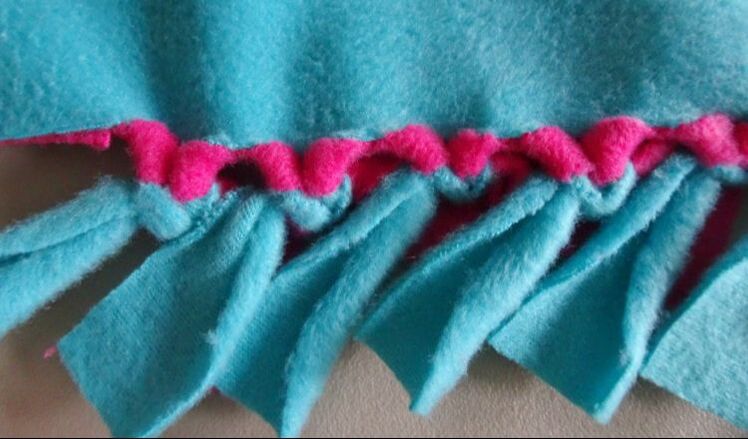 And that's it! Once you get the hang of it, it's easy to do while you're watching TV. I really love how this looks compared to the traditional tie blankets. It's not so bulky but still has the fringe (which cats and apparently puppies sometimes like to play with). 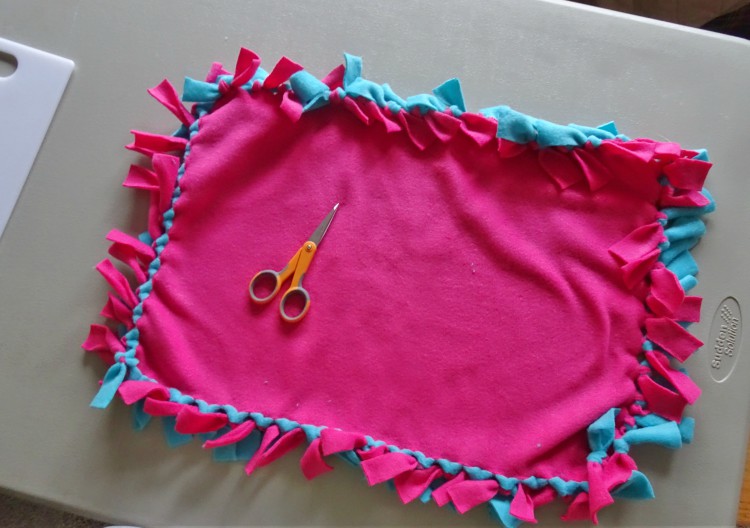 What do you think? What's your preferred method of making "no-sew" blankets? Have you tried this one? I'd love to hear about it! Psst...Want to make up these blankets and donate them to pets waiting for their forever home? Try a group like Wrapped in Love, which works primarily with rescues, or Comfort for Critters, who offers a database of shelters who accept homemade blankets. Thank you and happy crafting! Love it? Pin it!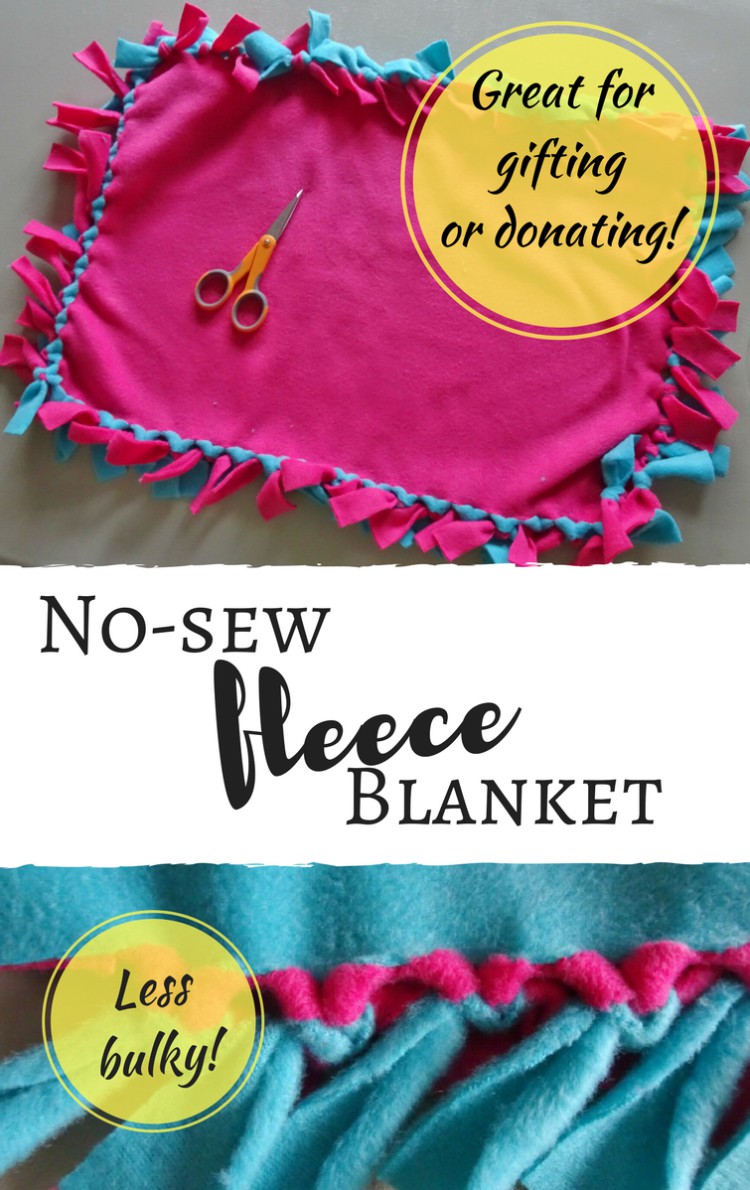
0 Comments
Leave a Reply. |
Welcome!I'm Emily and I hope you find something to amuse, inspire or entertain you here today. Follow along with us - and welcome to the pack! Recent posts
|
 RSS Feed
